Herupu is a highly customizable platform for business process automation. We use a travel request in this guide purely as a practical example to demonstrate secure data entry and case-centric communication. Your organization can completely customize all fields and workflow steps to their specific needs. Thanks to Herupu’s dynamic form behavior, you as a Requester are guided intuitively: you only ever see the specific fields you need to fill out, exactly when you need to provide them.
This form handles your entire travel lifecycle, from the initial approval request to the final expense report. User start by submitting the trip details for authorization. Once the travel is approved, users can simply return to this record; the system will automatically unlock the expense reporting section, allowing the user to upload receipts and claim allowances without needing to start a new process. Your master data is pre-filled automatically.
1.1 Login to the Business Travel Management #
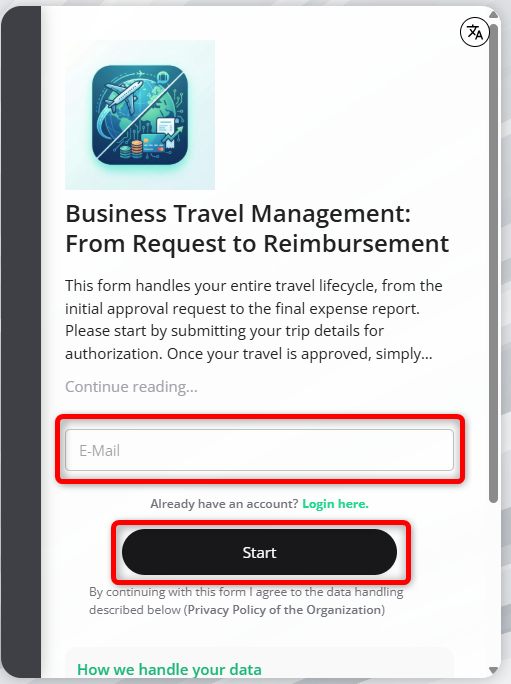
Step-1: Navigate to the provided link, for example in this case the link https://myorg.herupu.app/business-travel
1.2 Provide Credentials and Set Password #
Step-1: Enter the Email address to view the details as shown below.
- Enter the Email
- Enter the user name that you will use for logging in
- Set your password
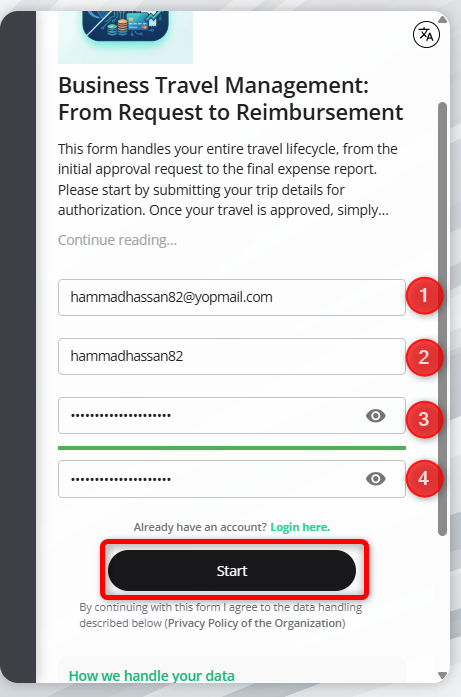
Once you have provided all the information, click the Start button. The system will send you a verification email to the provided email. Sample shown below.

Step-2: Click on the link and the system will validate the link and grant you access to the platform as shown below.
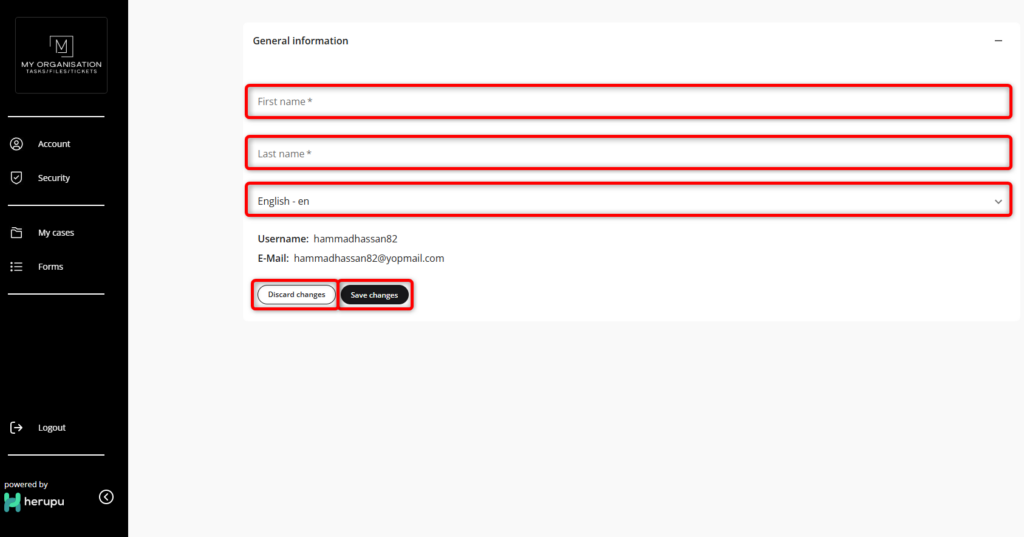
Enter the required information:
- First Name
- Last Name
- Language Selection
Step-3:To save the changes, click the Save Changes button, to discard and return to the previous screen click the Discard Changes button.
1.3 Filling the Travel Form (Part – I) #
Step-1: When you click the Save Changes button (in the previous screen), the system will display the frame shown below where users can enter the Trip details und Trip Estimates.
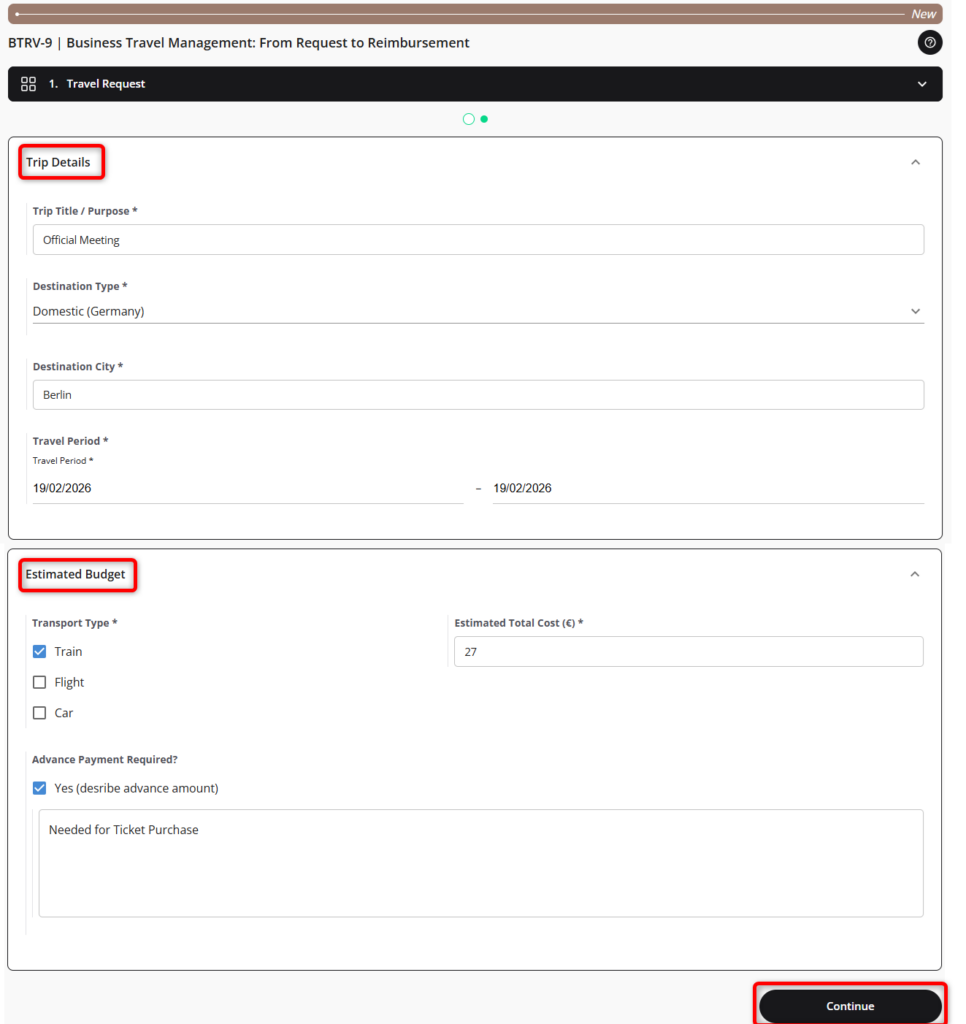
Step-2: Enter the required information in the Trip Detail section.
- Trip Title / Purpose
- Destination Type
- Destination City
- Travel Period
Step-3: Enter the required information in the Estimated Budget section.
- Transport Type
- Estimated Total Cost
- Advance Payment Required (with details)
Step-4: After providing all information, click the Continue button, to save this information and navigate to the Trip Confirmation page as shown below.
1.4 Review of the Travel Information by the Agent #
Step-1: The provided information is available for review. The Agent reviews the request and may approve the request or may request changes or pass some comments. Refer to the screen below.
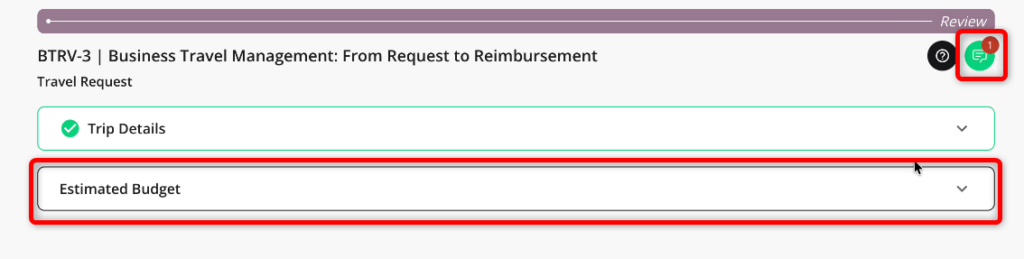
Step-2: Trip Details section was approved by the agent/moderator, however there is a comment that can be viewed by clicking the Message Notification button. The system shows the screen below when the message notification button is clicked.
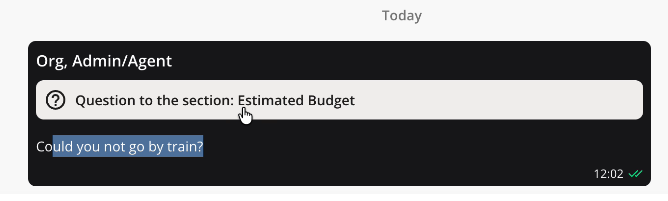
Step-3: Click on the question to move to the specific section as shown in the screen below.
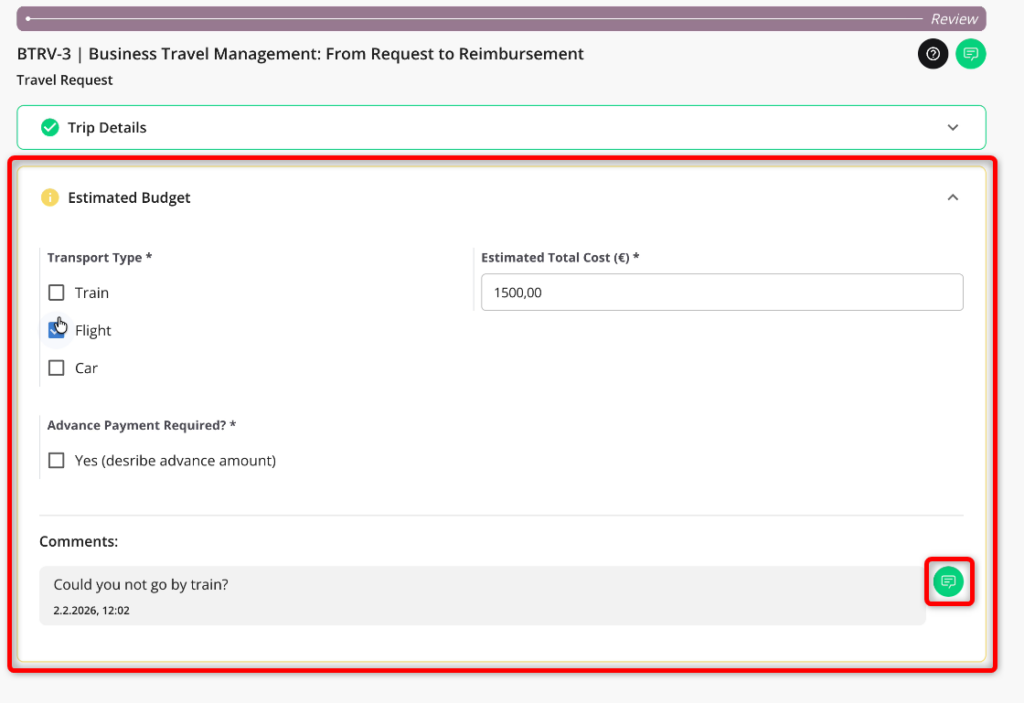
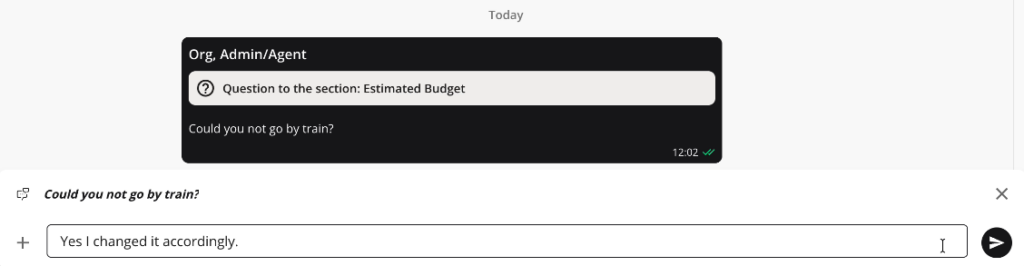
Step-4: Make the necessary changes. The user can respond to the comment as well by clicking the message icon. The system will show the screen shown below.
Note: All Comments history is maintained with the record for further reference.
1.4 Filling the Travel Form (Part – II) #
Once the agent has approved the Part-I of the Travel form, the user can now fill in the post trip information by simply clicking the same link. The system will automatically navigate to the screen shown below.
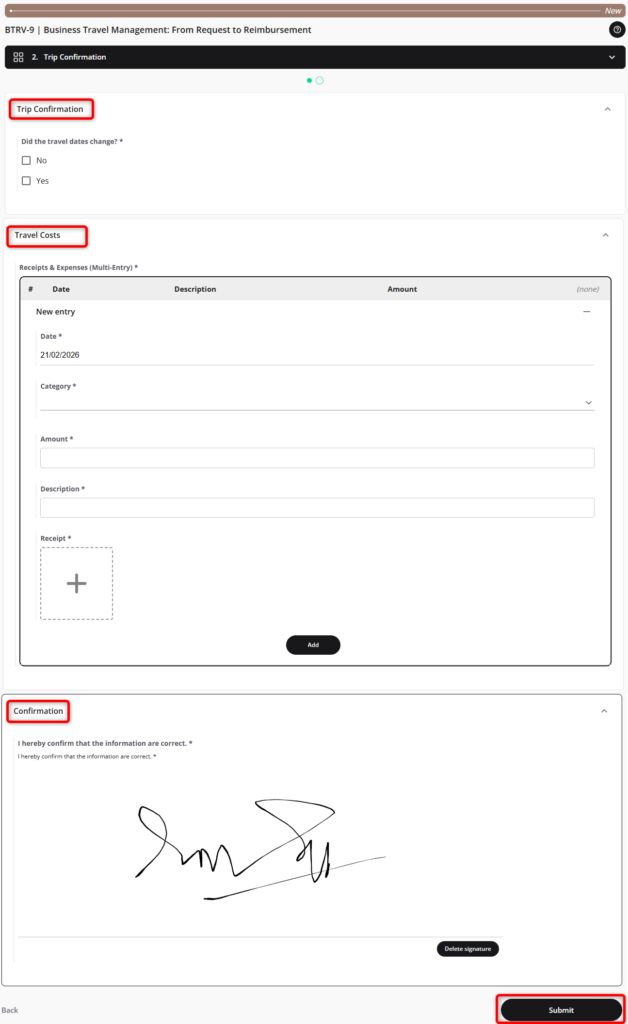
Step-1:In the Travel Confirmation section, click whether the travel dates changed or otherwise.
Step-2: Enter the required information in the Receipts and Expenses section.
- Date
- Category
- Amount
- Description
- Attach Receipts (Evidences)
Step-3: In the confirmation section, sign the document to confirm that all information is correct.
Step-4: Once all data is filled, click the Submit button to submit this form to the moderator for further action. Once complete, the system will display the confirmation message as shown below.

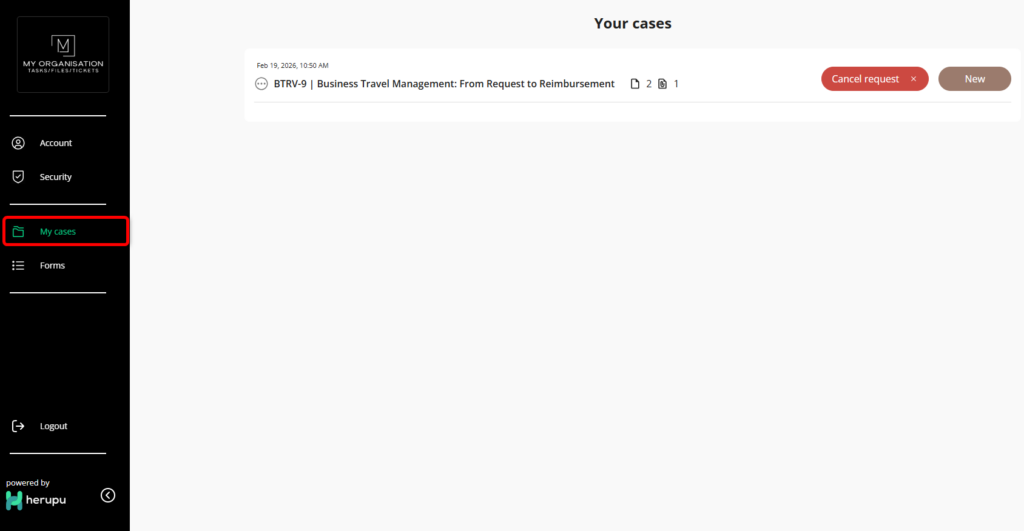
1.5 View Requests / My Cases #
Step-1: To view a list of all the cases click the My Cases Button in the previous screen or click the My Cases option from the Menu as shown.
1.6 Final Approval by the Agent #
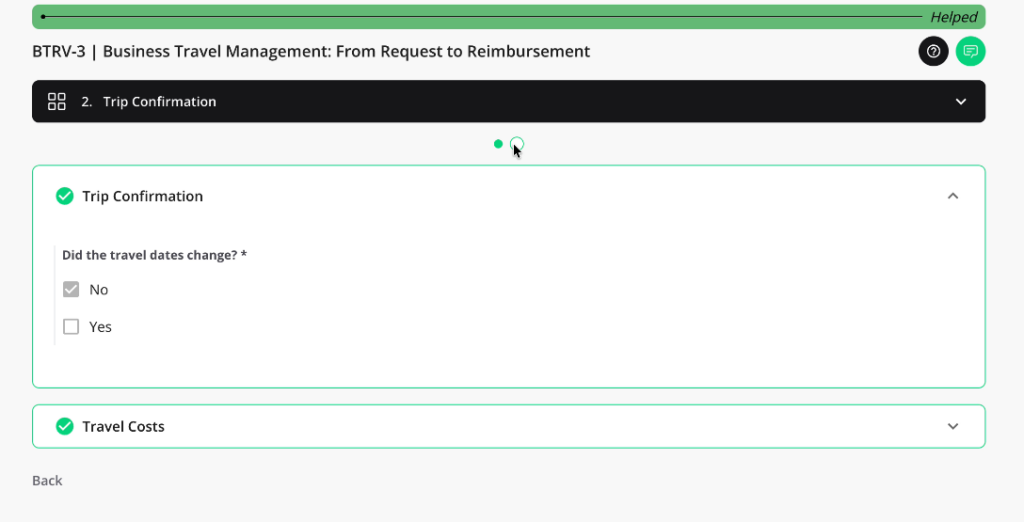
Step-1: Once the request form is approved by the moderator, it becomes final and no edits can be made to the form. Refer to the screen below for details
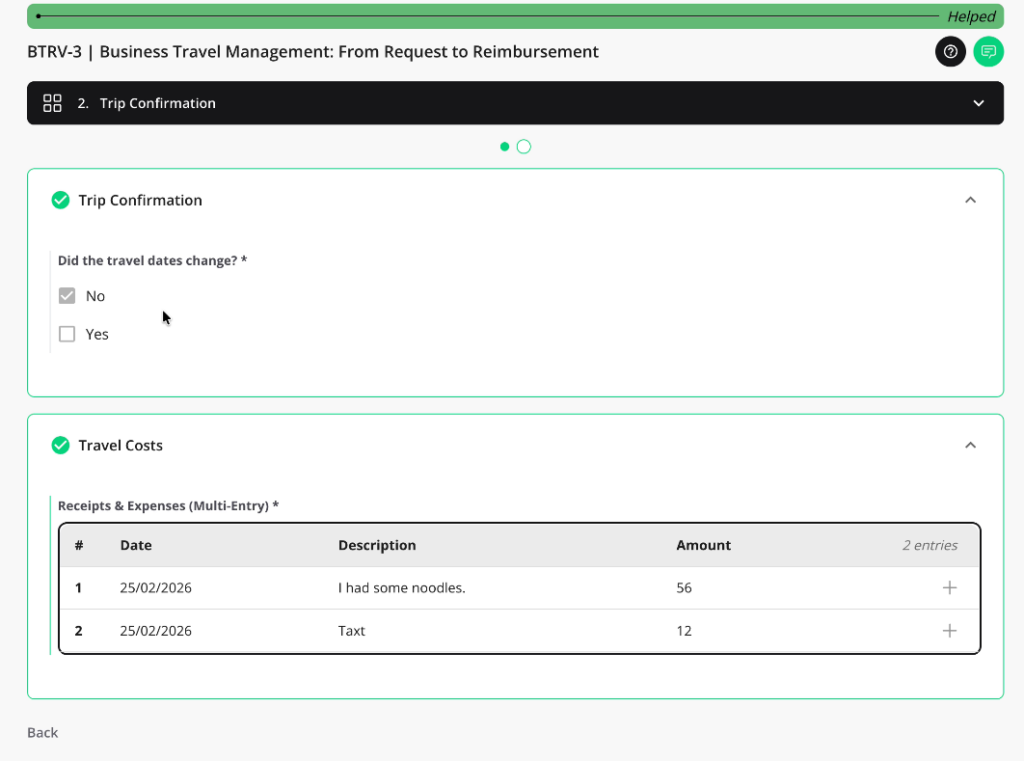
Step-2: In the Travel Cost section, The Receipts & Expenses is a Multi-Entry field, i.e., the requester can add Multiple records as per need. To add a new record, simply click the + button and a new row will be available to add details.
1.6 Section Comments (Chat) #
Comments are a very important aspect of the Herupu platform. The Requester and the Agent can collaborate on forms sharing information and getting the job done seamlessly.
Step-1: If the Agent has added a comment on a specific section of the form, the Requester can access the notifications by clicking the notification icon at the top of the form as shown below.
Step-2: Upon clicking the icon the system automatically navigates to the specific section/field, that was mentioned by the Agent while adding the comment. This helps as the Requester or the Agent do not have to search or navigate through the form sections to find the specific region requiring attention..
Step-3: Now, the Requester and the Agent can collaborate seamlessly in this chat, and this direct conversation is fully logged and maintained for further references.
This feature entirely replaces the need for messy external email threads, keeping all context directly inside the Case, making the whole process seamless and efficient.


